top of page

A special page for my car friends. Some pictures of the 1967 Camaro RS/SS 396 4-Speed at various stages of my 30 years of owning it

First Edition - 8-71 Blown 502BBC, Jerico 4 Speed, Ford Nine Inch - Bought it in 1995 as a partially restored, fully numbers-matching car. Have the original 396 and M-21 all stamped with the VIN. The previous owner repainted it in non-original Madera Red.
The car stayed in this version after building and installing a Blown 502BBC, Jerico 4-speed, 8-point cage, Ford 9-inch rear, fuel cell, etc.
An absolute beast to drive with around 800 HP. Kept it this way for a while and then decided to restore it in the early 2000s.

Restoration Starts - Took the car completely apart, down to a roller, and started with paint. Here it is, coming out of paint, in the original Marina Blue with the 1967 Bumble Bee stripe.


Building A New 502 BBC - The original numbers matching 396 BBC and M-21 transmission were removed and saved. Wanted to build a warmed-up 502BBC. Started with a GM Performance 502 Short Block and added higher flow oil pump and deep sump pan.


502 BBC Top End - The warm-up consisted of Bowtime Aluminum Rectangular port heads, 11.2 to 1 CR, Roller Hydraulic Cam, and Roller Rockers. I milled the "502 Chevrolet" on the Aluminum Valve covers using my 3 Axis CNC Mill with a Centroid Acorn Controller. I created the design in Fusion 360


Finished Engine - Ran the Engine on the test stand for about 2 hours. Did a nice, easy break-in and dialed in the tune on the Holley 850 double pumper and GM HEI Ignition. Those are the largest Hooker Headers you can put in a first-gen Camaro w/o cutting - big 2 1/8 inch primaries. Also did the first oil change when it came off the stand.
Here are a couple of videos on the build and the engine stand break in


Clutch and Transmission - Always had good luck with Centerforce dual friction clutches. Replaced the original M-21 with an AutoGear "M-23," which is a beefed-up M-22 (hardened gears, better syncros, bigger shafts), good for 800 lb-ft of torque.


Engine Install - I have removed and installed the engine and transmission in this 67 Camaro probably a dozen times (different engines, a rebuild of the original, restoration, etc.). I can get the engine and transmission in or out by myself in about 90 mins. The tilting engine hoist is the trick.
Here is a video of the Engine and Transmission install:


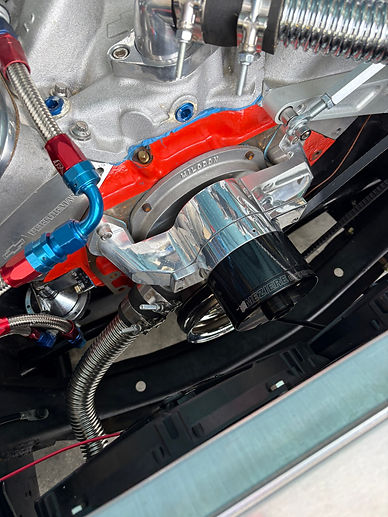
Big Block Cooling- High water flow rates and great heat transfer are key to keeping a 625HP BBC cool. I used a two-row Griffin aluminum radiator, dual-shrouded 12-inch electric fans, and a Meziere 55 gpm electric water pump. Engine runs about 185 to 190F on a hot day.


Full Chassis Rebuild - I completely replaced the front suspension (coil springs, upper/lower control arms, ball joints) and steering (steering column, steering box, tie rods, anti-sway bar, pitman arm), and redid the brakes, including a new Master Cylinder, new calipers, hard lines from front to rear, etc. The car is a fairly rare original front disk brake car.


Replaced All Wiring - Pulled out the almost 60-year-old wiring harness and replaced it with an 18-circuit Painless Wiring Harness. Used a P-Touch printer to print heat-shrink tubing labels for all wires.


Restored Speedo and Tach - I wanted the original look on the main dash instruments, and I restored the Speedometer and Tachometer. Like all the interior paint, I painted the Dash Panel in the original Bright Blue GM 1967 Color.


Upgraded Instruments - That fine 502BBC deserves accurate monitoring, so the one interior mod is a set of Autogauge 2 5/8-inch gauges. Oil Pressure and water temperature are both mechanical (hard oil line and capillary line for water) for failsafe readings. A voltmeter has a dedicated wire to the alternator output, and the fuel gauge has dedicated signal and ground wires to the sending unit for super-accurate readings of the 0 to 90 ohm signal. Switches are for the electric fan pair and the electric water pump - I like to control them by watching the water temperature. With big aluminum radiators and electric water pumps, my BBC builds have tended to run on the cool side, so I toggle the fans as needed.
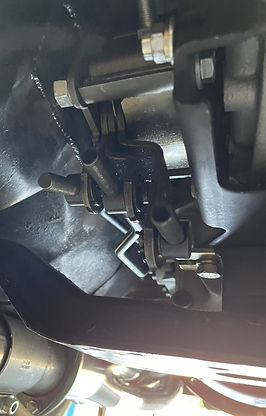

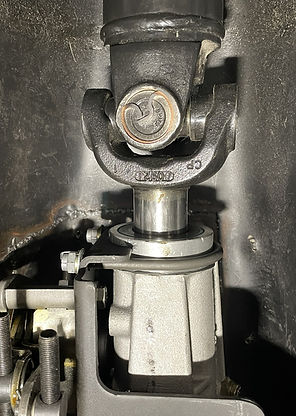
Good Looking Underneath - Car is super clean underneath after all the chassis and suspension rebuild. Here you can see the a) Hurst 4-speed shifter linkage, b) Lakewood Bellhousing, and Moroso clutch fork, c) Spicer tailshaft and 1350 U-Joints. You see how those large good looking Hooker Headers fill the lower engine bay.


3 Inch Hooker Blackhawk Exhaust - The Hooker 3-inch stainless exhaust, like the headers, barely fit but went in w/o modication. Sounds great - not too loud, just super powerful as that 625HP 502BBC purrs.


Interior Back to Original Bright Blue - I painted the dashboard, door upper panels, new IdidIT steering column, all in the original color, plus a coat of clear coat. Replaced all the vinyl on seats, sail panels, and roof lining. Spent a bunch of time restoring the steering wheel to the original deluxe interior look.


New Window Hardware and Rear Interior - Installed new window regulators, tracks, and glass in all four corners. Redid full rear interior. The upper armrest well covers are no longer made, I found a pair on ebay and refinished to match rest of interior

All Cleaned Up - First time out of the garage in years and got a bath. Looking good. Still need to do weather stripping, windshield wipers, some rear interior work, covering wiring in braided conduit, and install the 3-point seat belts. Then it will be ready for a drive.

This Part is done :) - 625HP 502 BBC is all done, tuned, and ready under the hood.
First Drive done! - Made a few shake-down runs around my area. No issues. Car is super smooth and very powerful. More full power runs and videos coming. Gets MAYBE 6 mpg :)


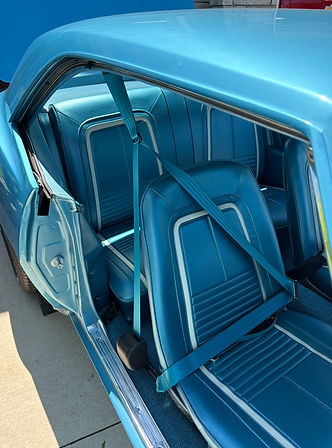
Seat Belts In - Nice color matching Morris three Point Seat Belts


Upgraded Electric Power Mains to 2 GA and Flaming River Power Switch and 1000 CCA Optima Battery
Making sure plenty of cranking power gets to that 502BBC


Added CalTracs Traction Bars
These plant the rear end hard on acceleration. The car is way under-tired to maintain stock looks, but with the CalTracs bars no more wheel hop and I can still smoke up the 245R60 rears in 1st, 2nd, or 3rd gears


Upgraded Front Suspension to Tubular Control Arms and QA1 Coil-Over Shocks
Used 500 lb/in spring rates, a 1 1/8 inch sway bar, and the Car corners great now! Super tight with those 2 1/8 inch primary tube Hooker Headers, but it fits. Did the front end alignment with a couple of new tools. Caster is at 3 degrees positive, Camber at 0.5 degrees negative, and 1/8 inch toe-in.


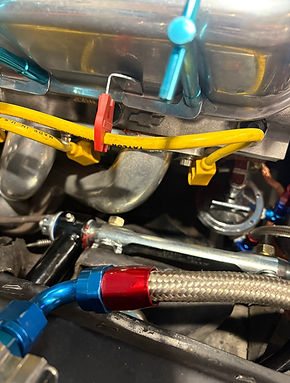
Upgraded Radiator Hoses to -20AN Braided Stainless Steel Lines
Always wanted to do this, and now the adaptors are available to add -20 AN fittings to the water pump, thermostat hosing, and the radiator inlet/outlet. -20 AN Hoses are a beast to fit, assemble, and flex. I cut these ones 3-4 times, slowly shortening them until they fit perfectly.
Inside Info: A 700 HP 540 BBC w/Tremec TKX transmission will replace this 502BBC in the next few weeks!


bottom of page